I wanted a NAS for my home network. I could have just built a PC and shoved some hard drives in it. I wasn’t really interested in that approach at this time, because hardware prices are very high right now. Also size, noise, and power consumption is higher than a dedicated NAS. I also could have just bought an off the shelf NAS. The biggest downside here is price and ability to upgrade.
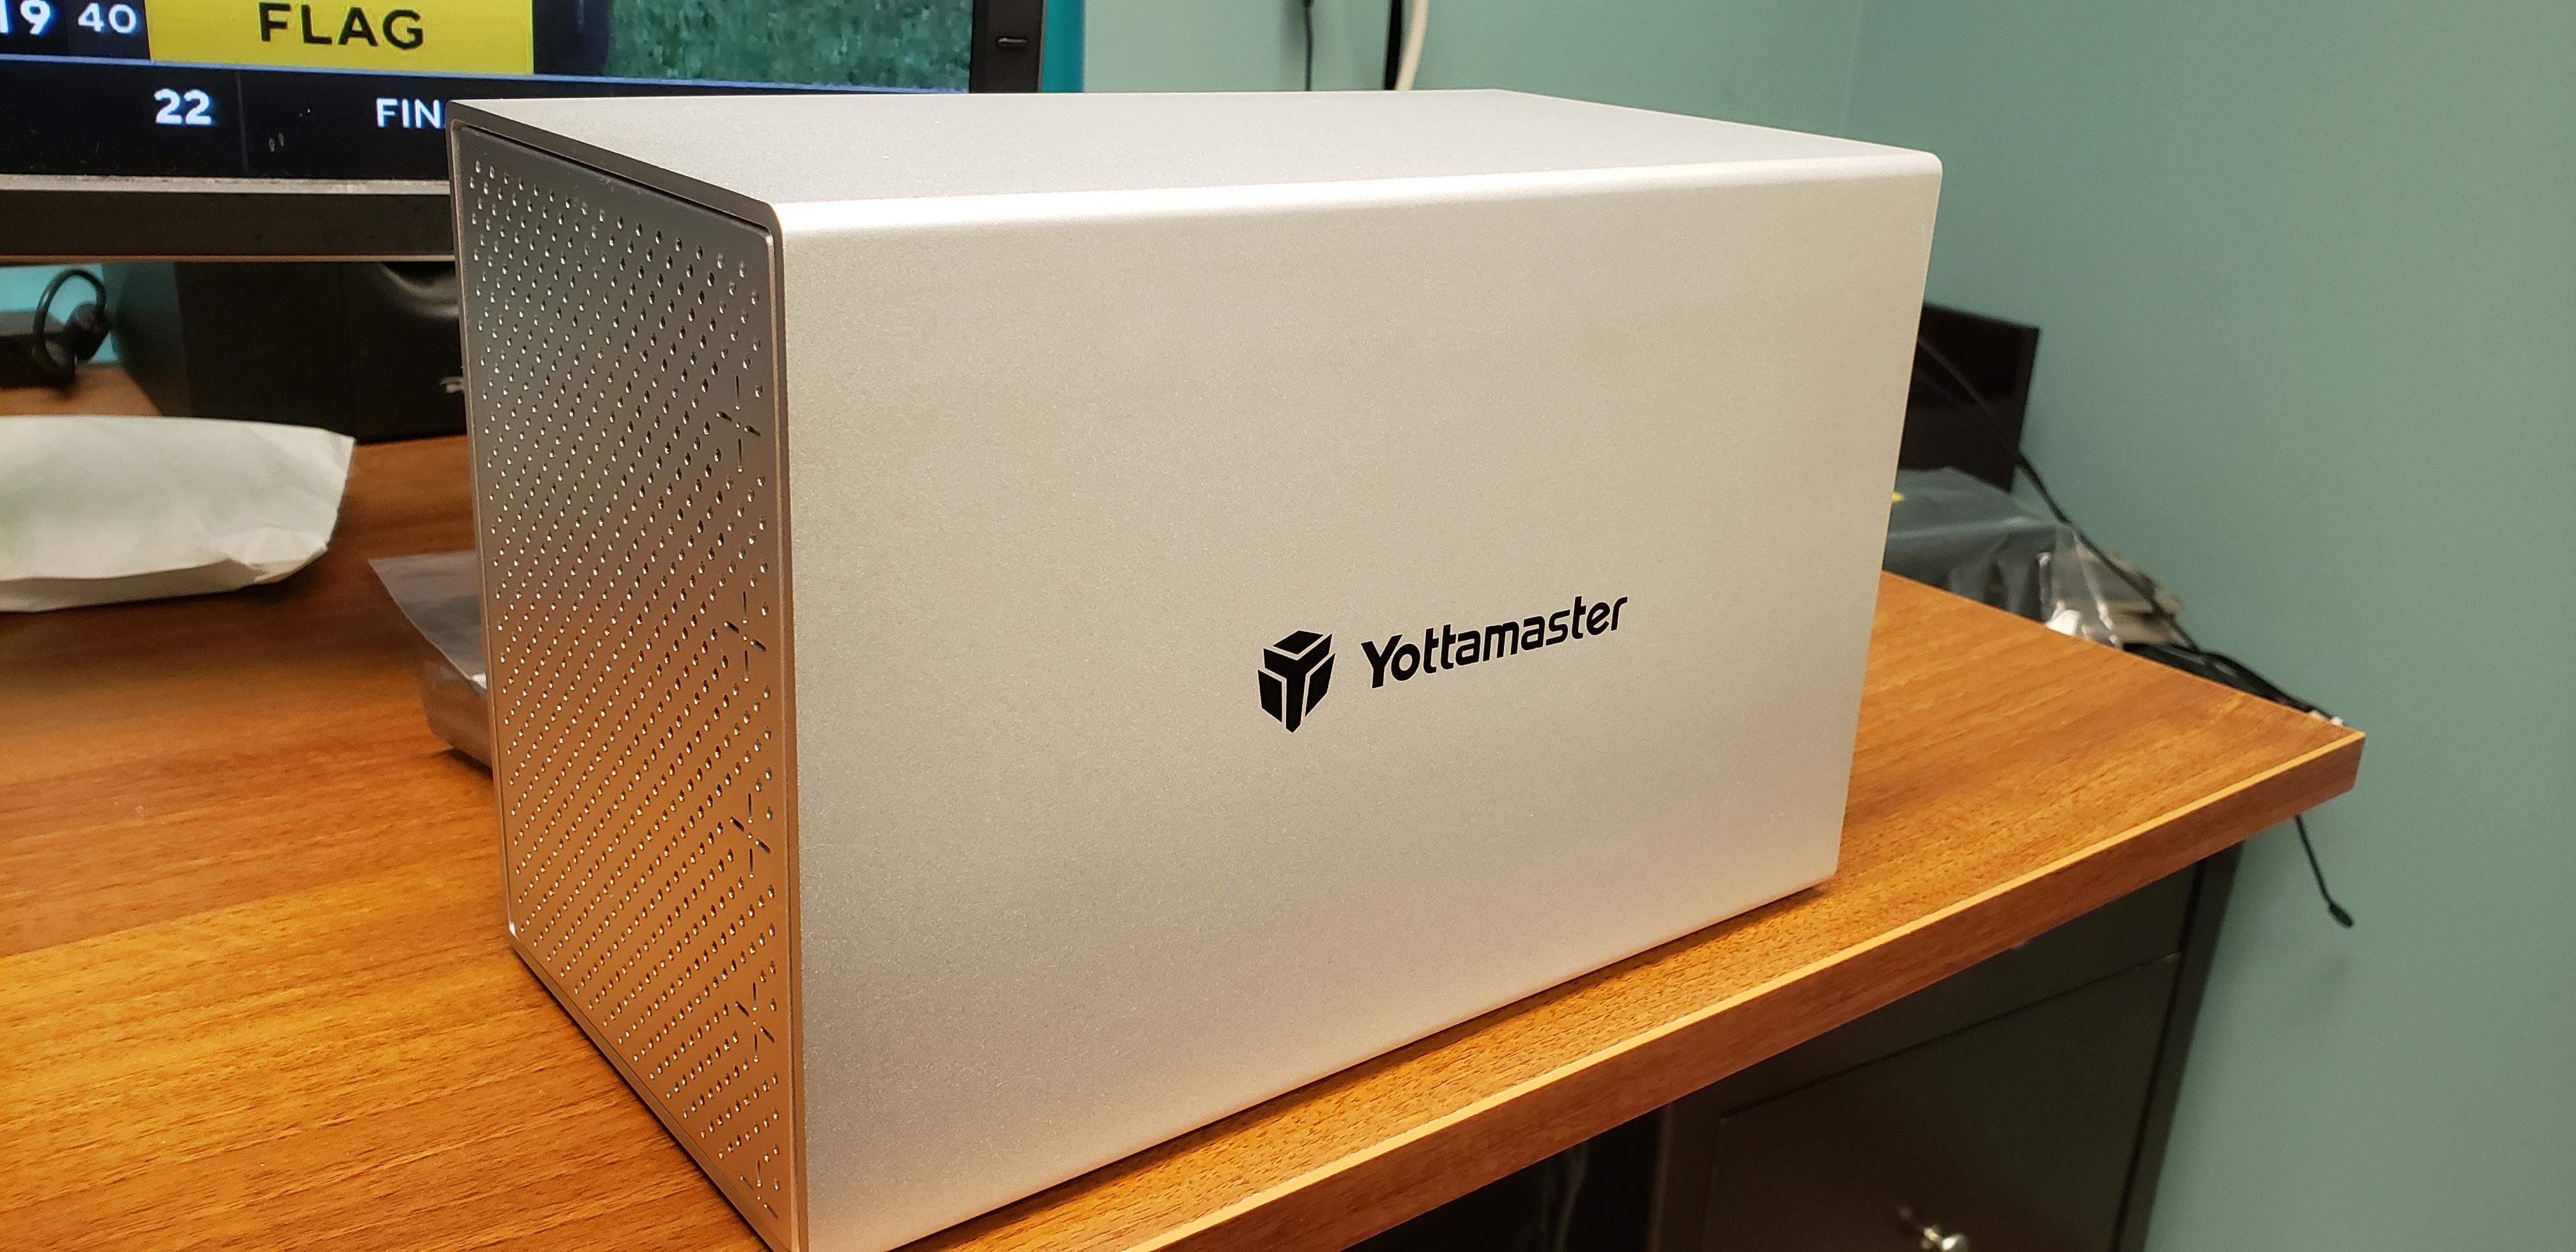
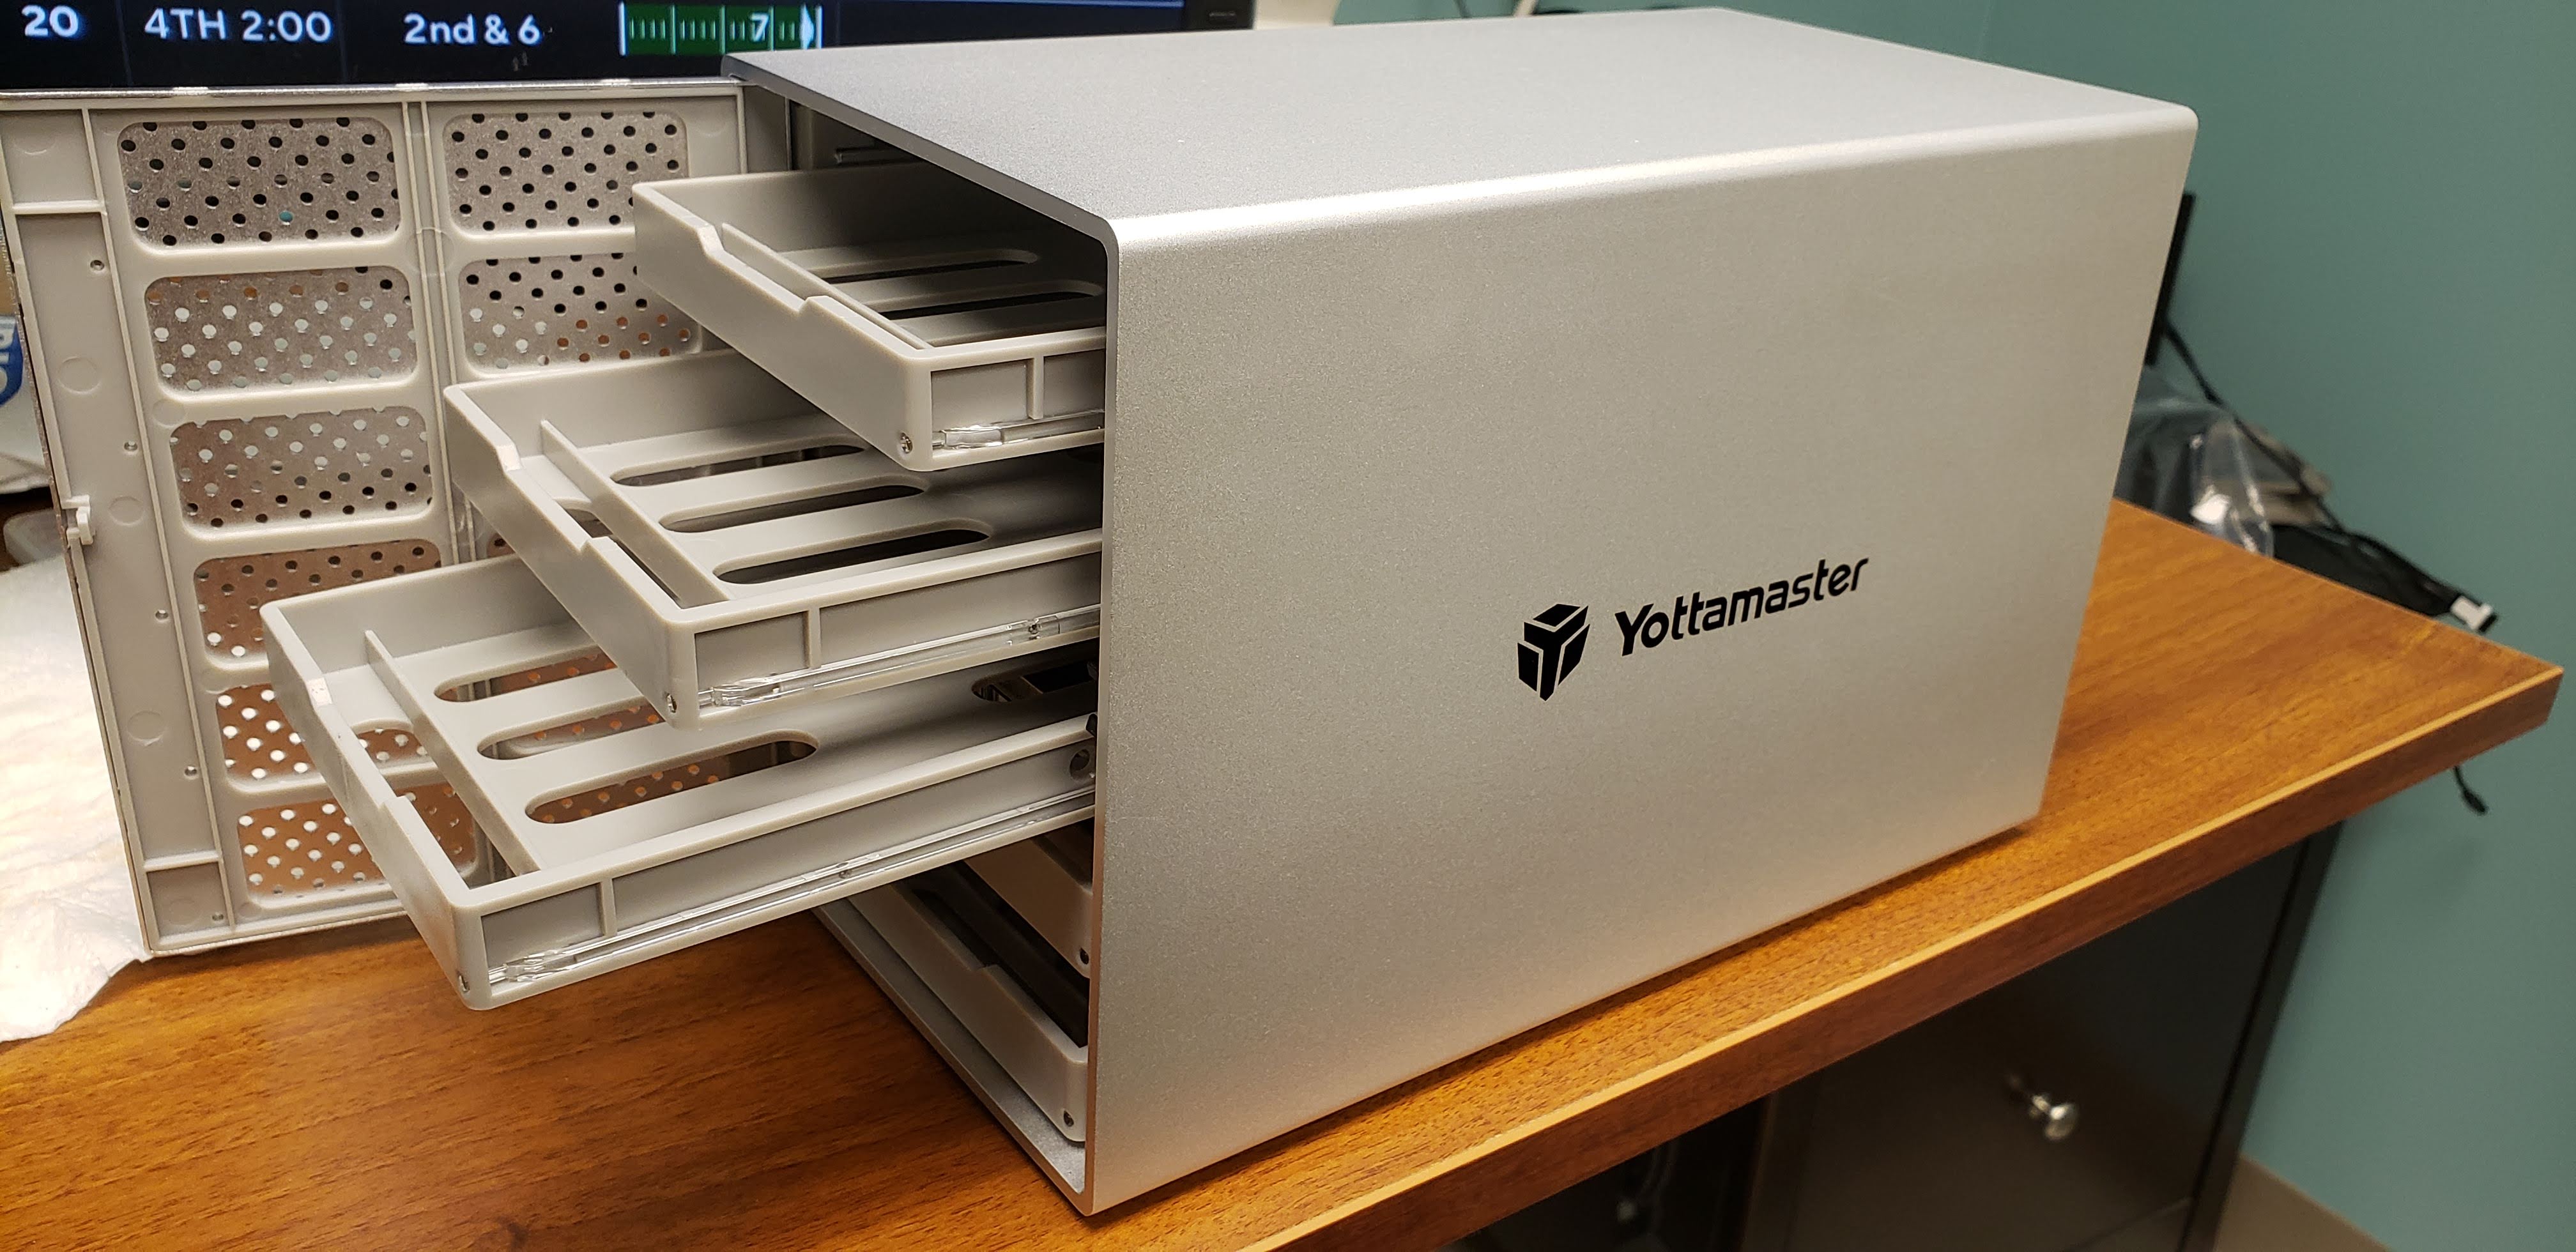
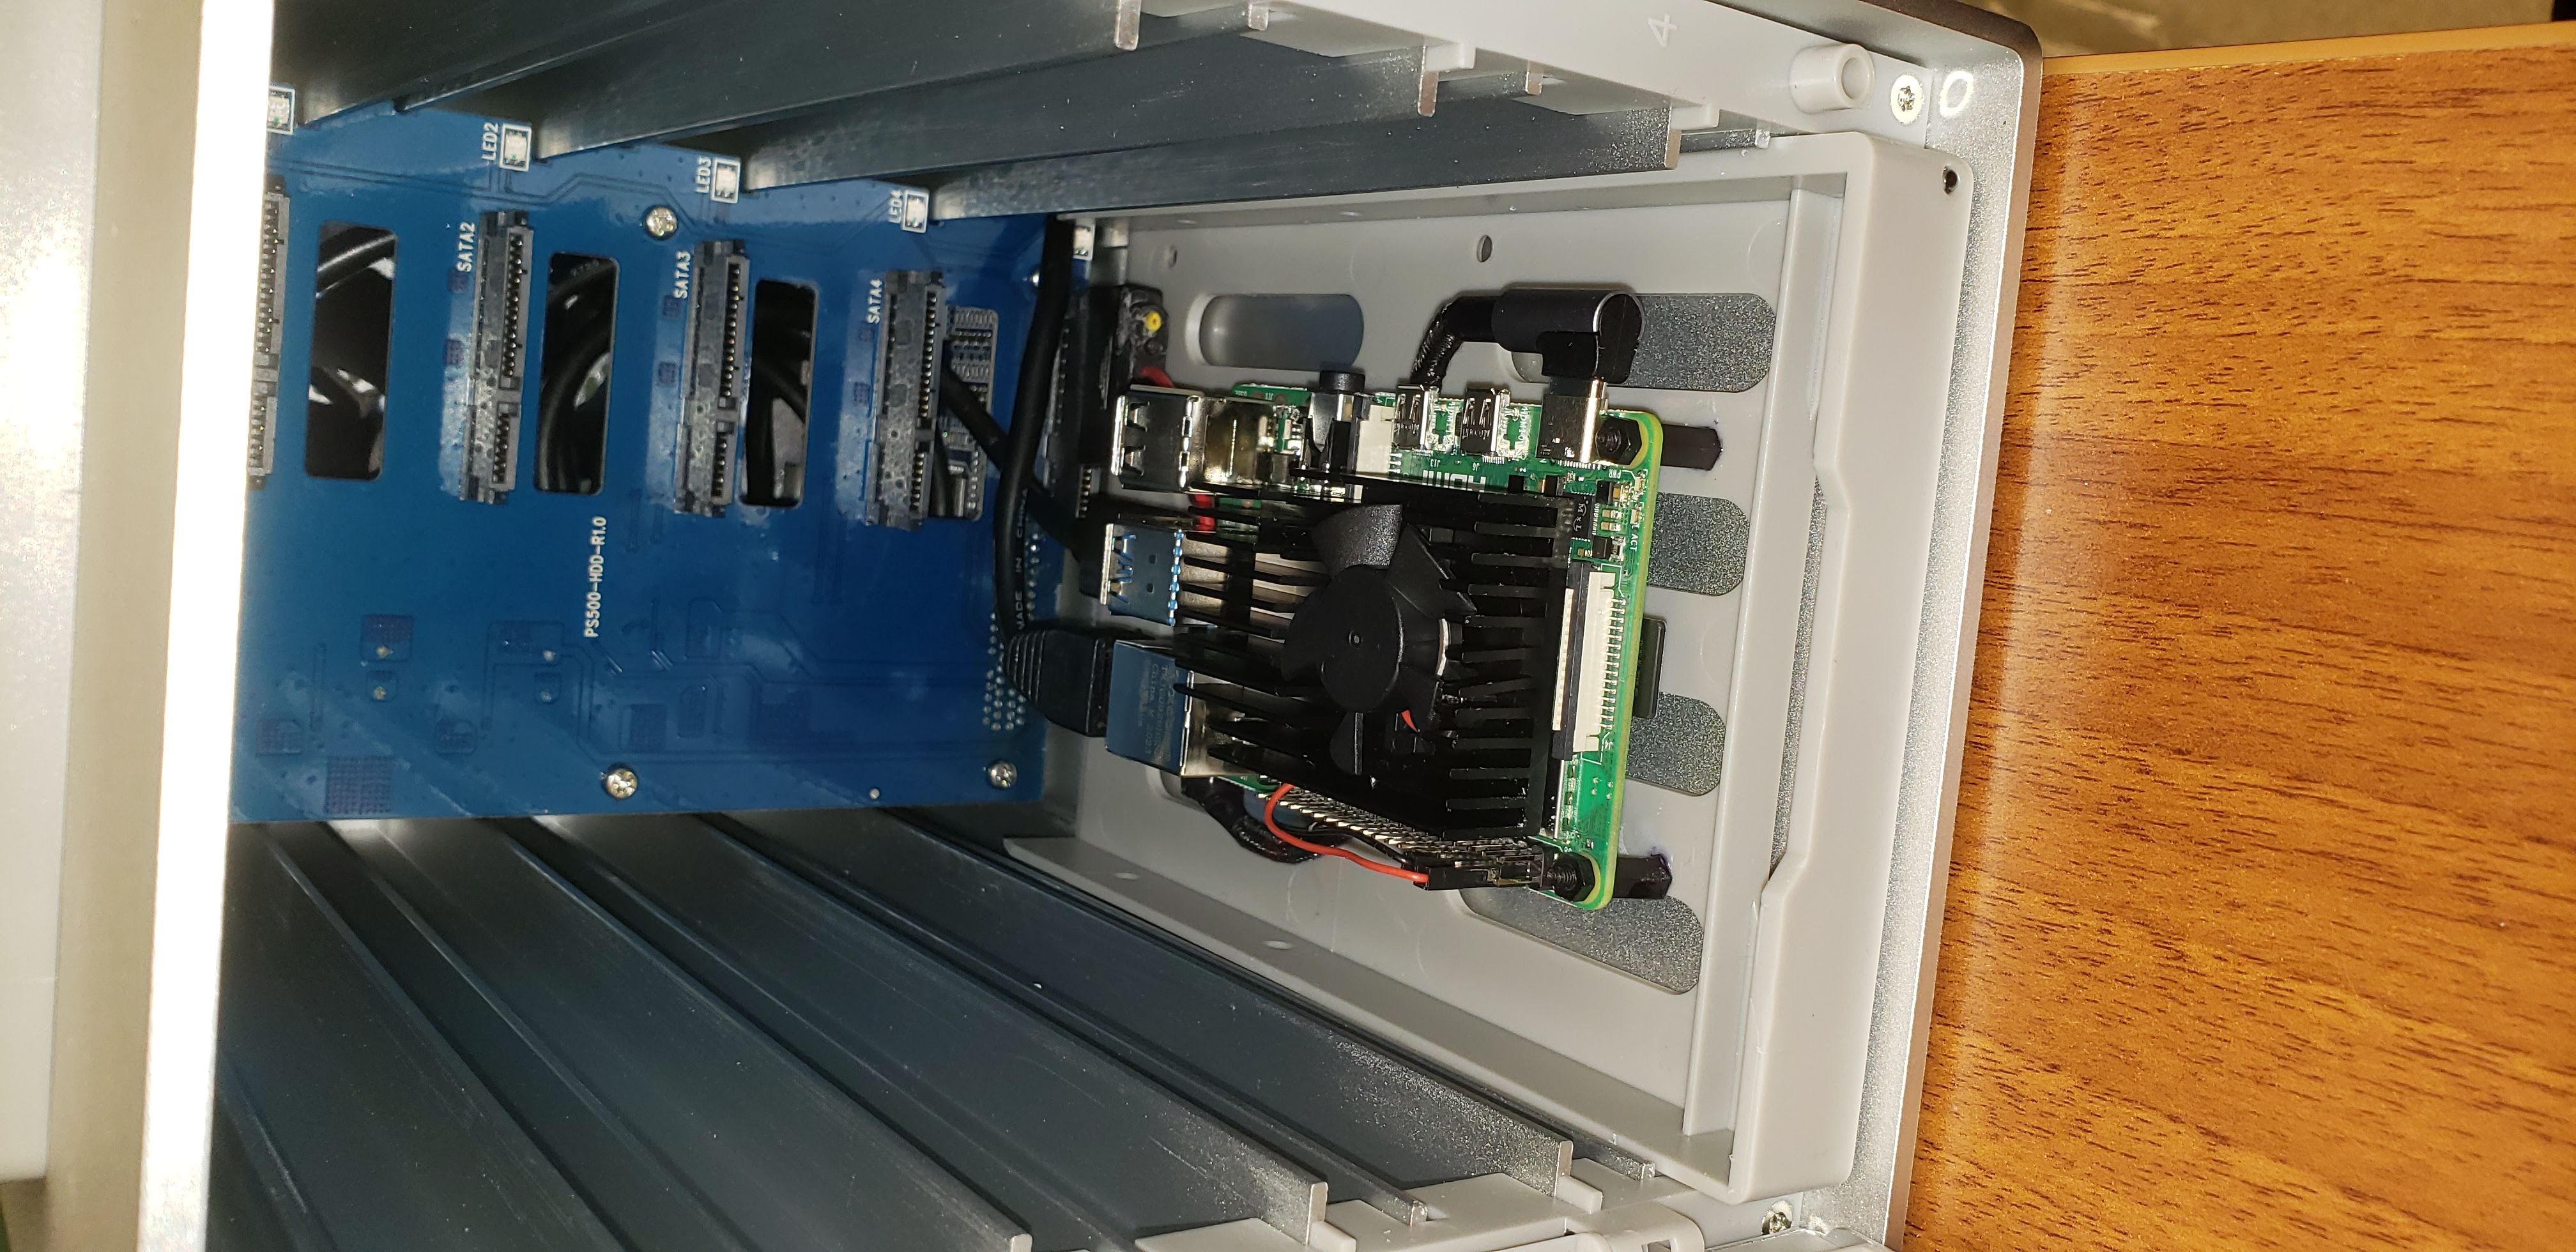
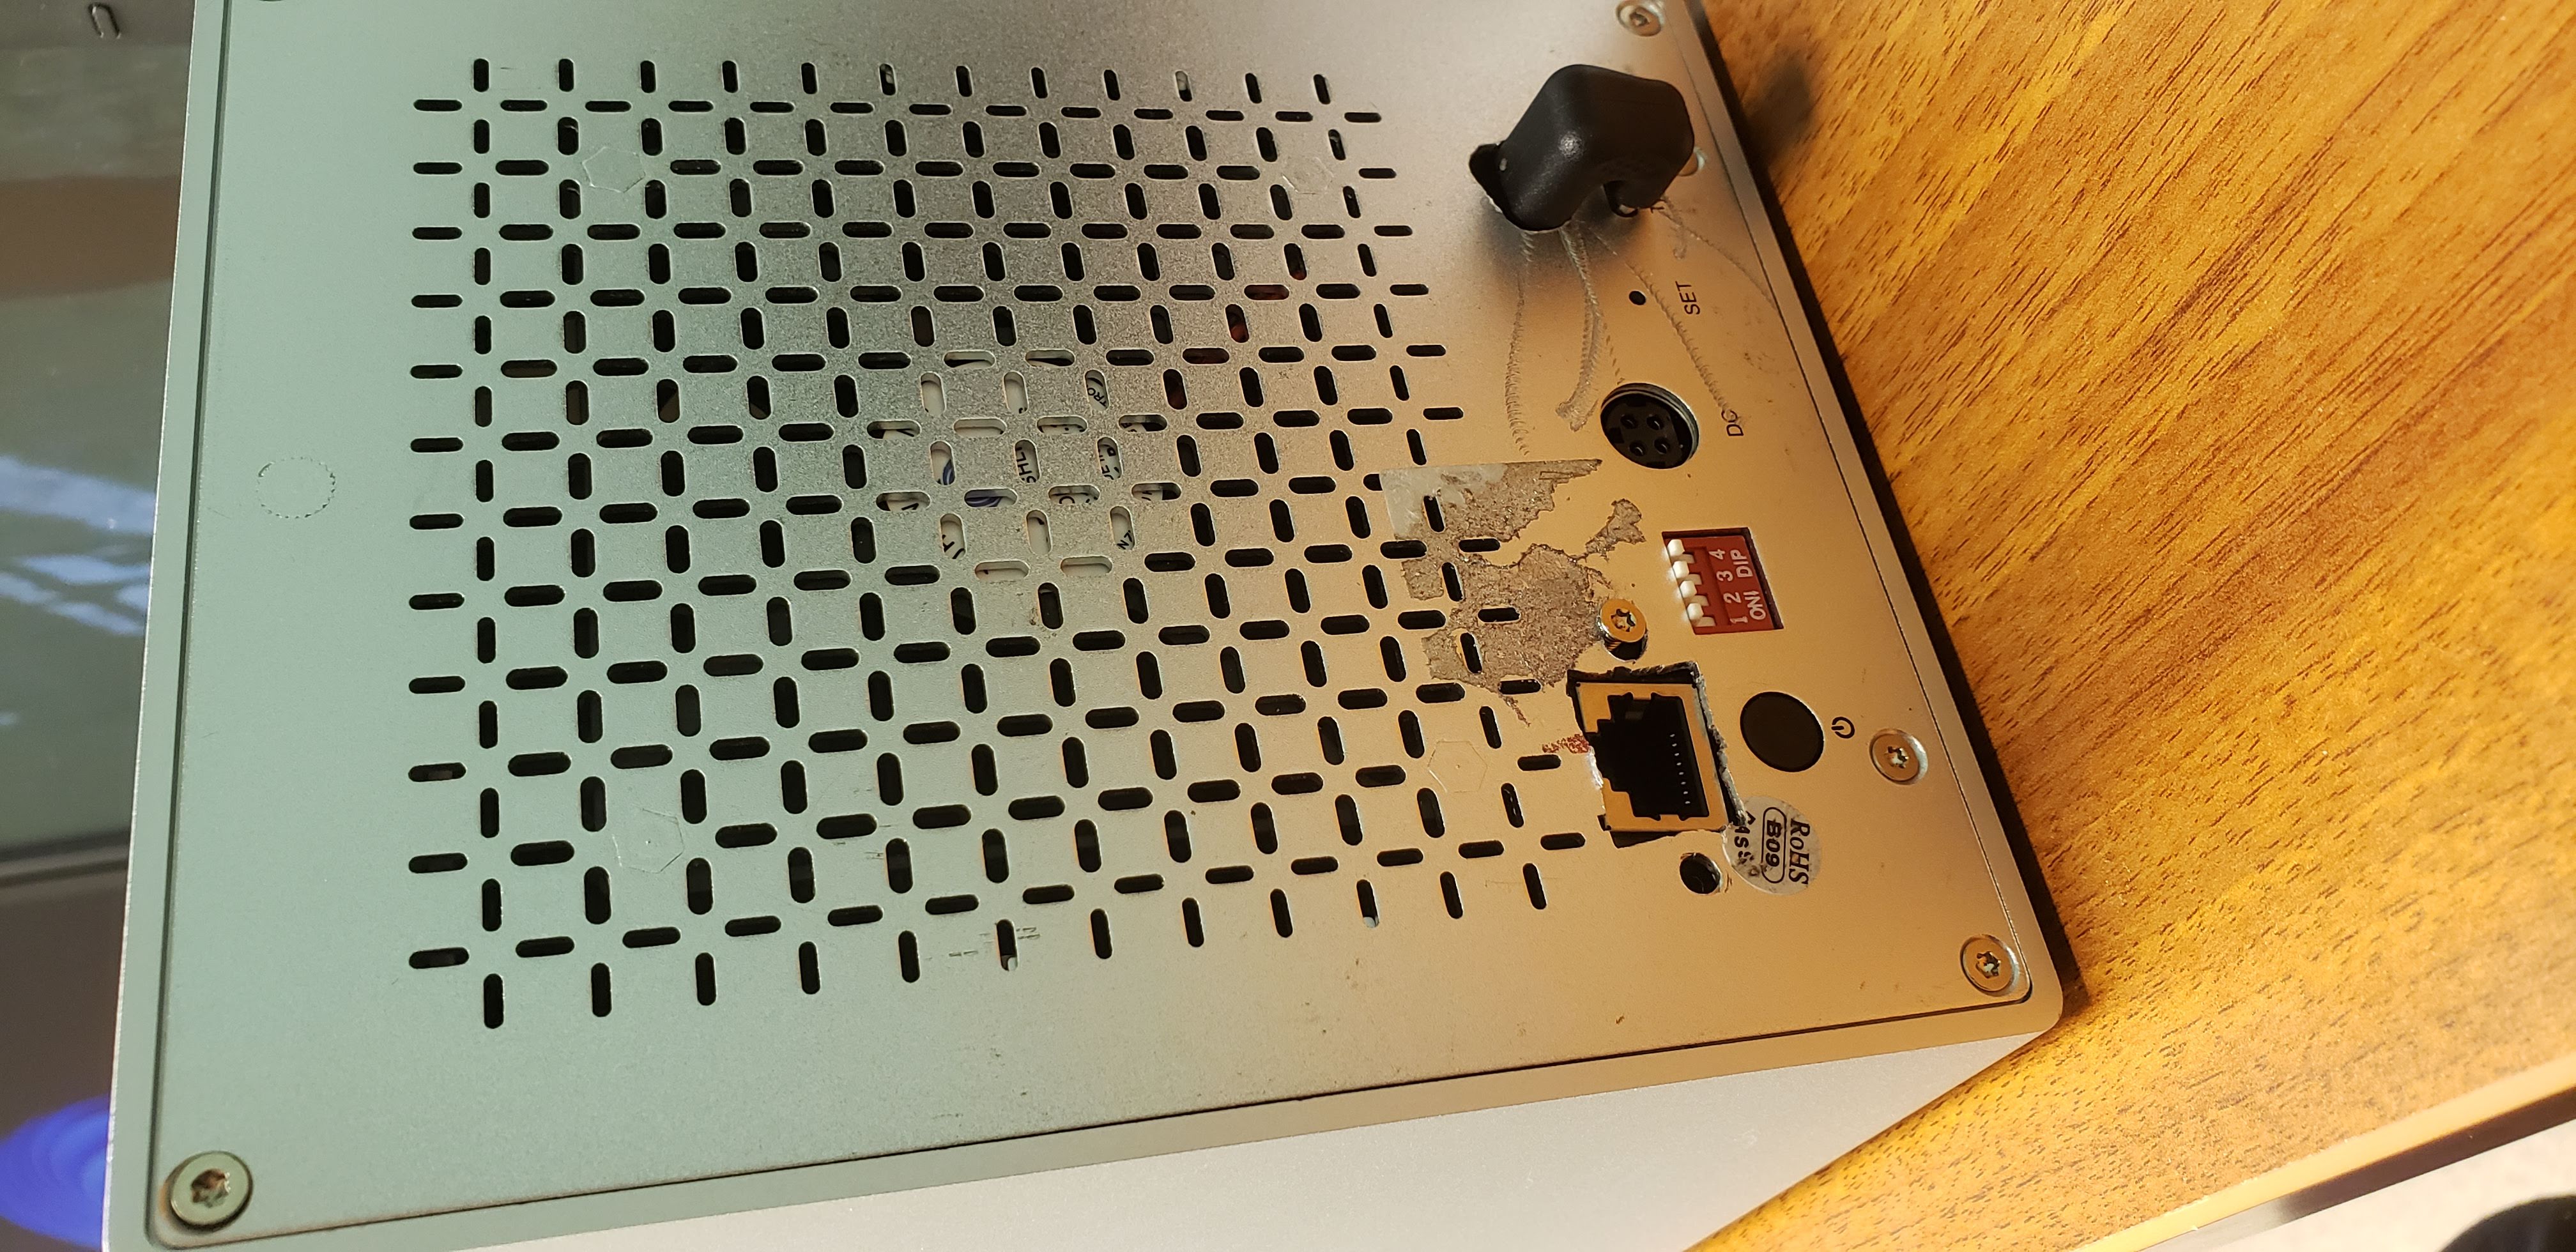
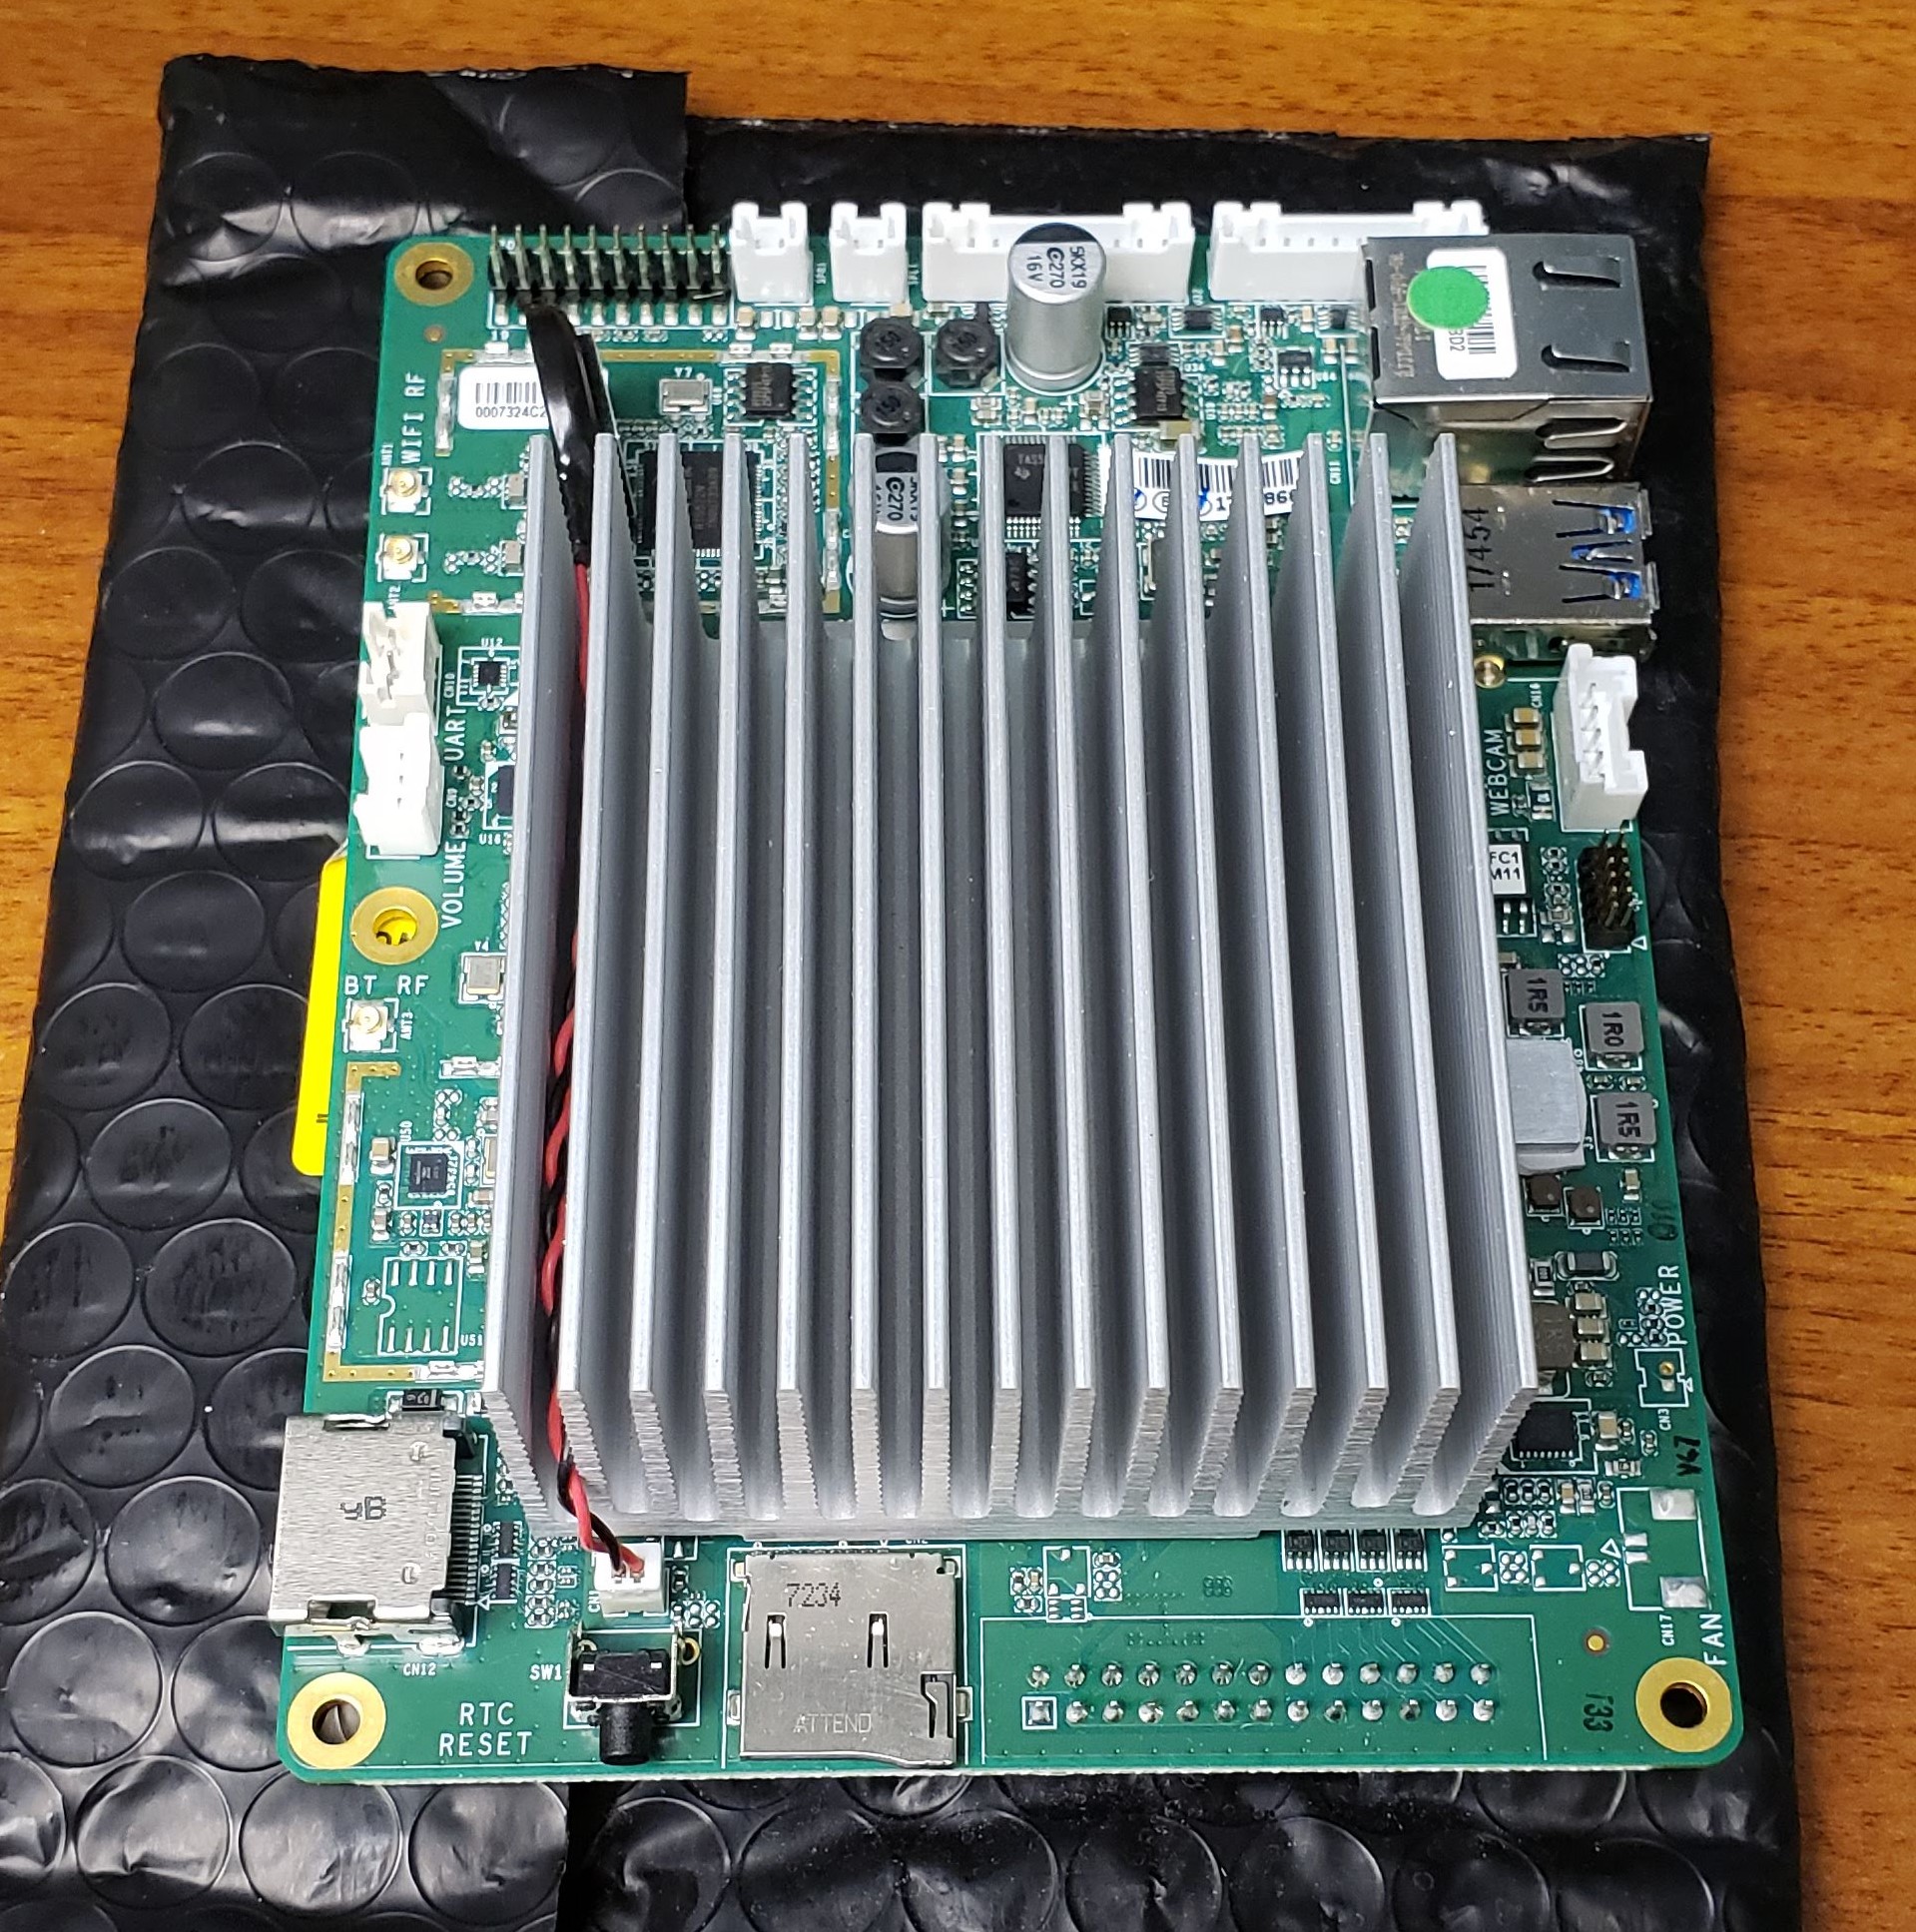
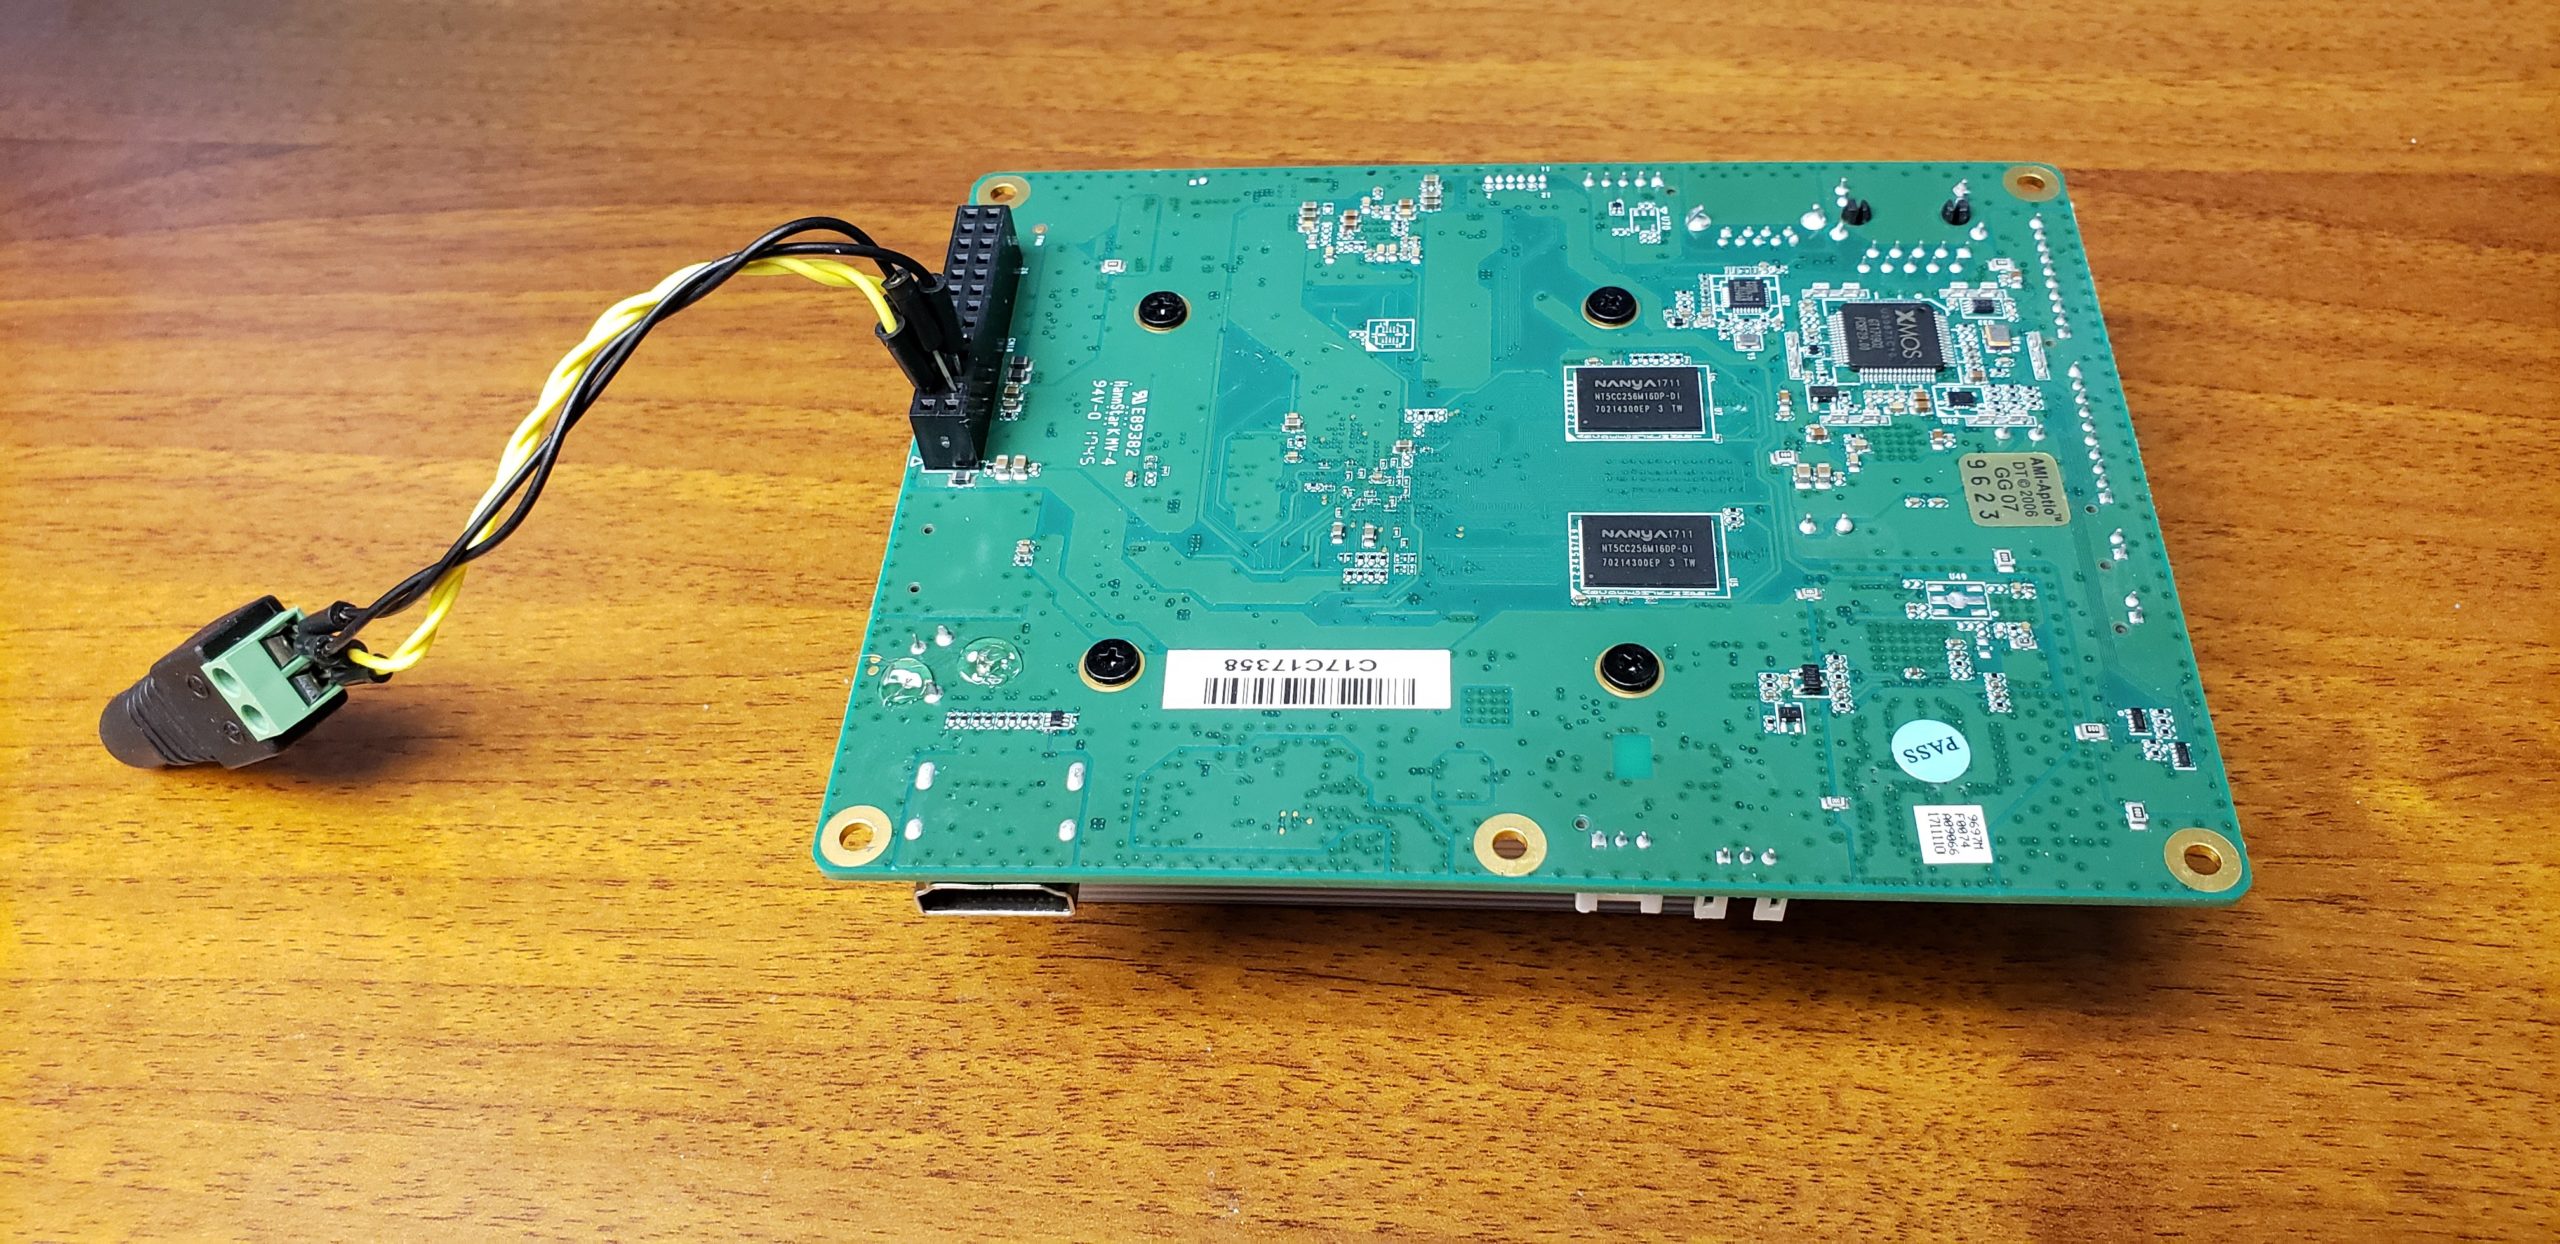
This is what I purchased though not the prices I paid. I got the hard drive enclosure from ebay, the raspberry pi 4 from pishop.us and had the microsd card laying around. Sadly the U shaped connector did limit my file transfer rates (cut them in half), so I’ve since ditched it. I really like how it looked, but it’s on the back of the NAS which my terrible cutting has made look bad anyway. The pi is powered off the 5 volt pins from the sata power inside the enclosure. I just took the sata male power connector and spliced it into the 90 degree usb c cable. You could definitely save some money by going with a usb 3.0 model, one without hardware RAID (I’m not using it), and if you want to go with a 4 bay enclosure (for 3 usable bays). You could also go with a pi with 4gigs of ram, and the heatsink with a fan is overkill. With all those omissions, you could build it for around $200.00.
Why do this?
I did this because I wanted to see if it would work. I was surprised how little similar projects I could find on the internet. There are plenty of NAS projects using compute modules and small batch boards. Also there are projects using 3d printed cases. I have not found anyone else taking a multi-bay usb enclosure and turning it into a self contained NAS. Other upsides are price and upgrade-ability. If they come out with a pi5 it should be trivial to swap it out and have a more powerful NAS.
Why shouldn’t you do this?
You are ultimately connecting up to 4 sata drives over a single usb 3.0 port. This bottlenecks access speeds, it’s fast enough for my uses, but something to keep in mind. If you need a high performance solution, this isn’t it. The project took some trial and error to get it working. And it probably isn’t the most reliable solution out there.
UPDATE
Someone brought to my attention that USB 3.0 has a capacity of 4.8Gb/s. It may still be a limiting factor. I’m only using a gigabit Ethernet connection, so that is the biggest bottleneck in this setup.
Thanks for reading
I’m probably overly proud of this thing. It looks better than an old computer. It’s specs are better than an off the shelf solution. And it feels like an original idea.
A coding assessment test is a programming challenge companies send their prospective new hires to see how much they know about writing software. They are generally an online only environment and is timed. Some popular sites are codesignal.com, codility.com.
A bit about me
I’ve been writing software professionally for about 15 years. I’ve held the title of Senior Developer for around 9 years. And I don’t even hate solving puzzles with code. Somewhere in an old repository I have about 50 problems solved from the site projecteuler.net
Why am I terrible at them?
I think my problem is that it isn’t conducive to how I work. When I run into a novel problem in the real world, I tend to either poke at it or just sit with it then walk away. Then I might come up with something to try and poke at it again. Rinse, Repeat. Eventually I come up with a solution that works. Later I’ll likely go back to it, clean it up and make it better. That approach doesn’t really work when you need to solve the problem within a timed test. I generally do get a solution that works, but it’s never one that I’m proud of.
They tend to hide the criteria they use to grade your submissions. This feels in bad faith. If I wrote some code at work and was told it was too slow, I would gladly go back and refactor until I got it to a more efficient state. Many times these tests will tell you it works, but not give any information on efficiency. Then after submitting the test it will tell you that your code wasn’t fast enough. Why not tell the test taker that when they have an opportunity to fix it? What real world scenario is like that? There is no logical reason to have performance requirements that are secret.
It doesn’t test for things that I think are most important. These assessments can easily test for correctness and performance. They cannot test for readability, cleanliness, or maintainability. Those factors are very valuable to a development team, and are harder to find in new hires.
What should companies do instead of online coding tests?
My preference is to offer prospective hires a medium difficulty take home assignment. It could be a puzzle type question, or it could be an example of a real problem they might run into on the job. You could give them 3 or 4 days to complete it. This gives plenty of time to find better solutions through trial and error. I think companies are worried that the candidates may ask someone else to solve something like this for them. Which could happen, but could mostly be rooted out by asking them to explain their solution and why they went with that approach. If they can confidently explain the code in front of you, and go through their thought process, then it’s likely they actually wrote it.
Final Thoughts
Online coding assessments are a gate that can filter out a lot of bad candidates, but it also filters good candidates who may struggle with the testing format. I’ve always seen software development as an iterative process. Write it once, if it fails, try again, re-write it better, clean it up, make it run faster, do it over and over till you can’t find any other way to make it better. An online test that allots 35 minutes doesn’t allow for that.
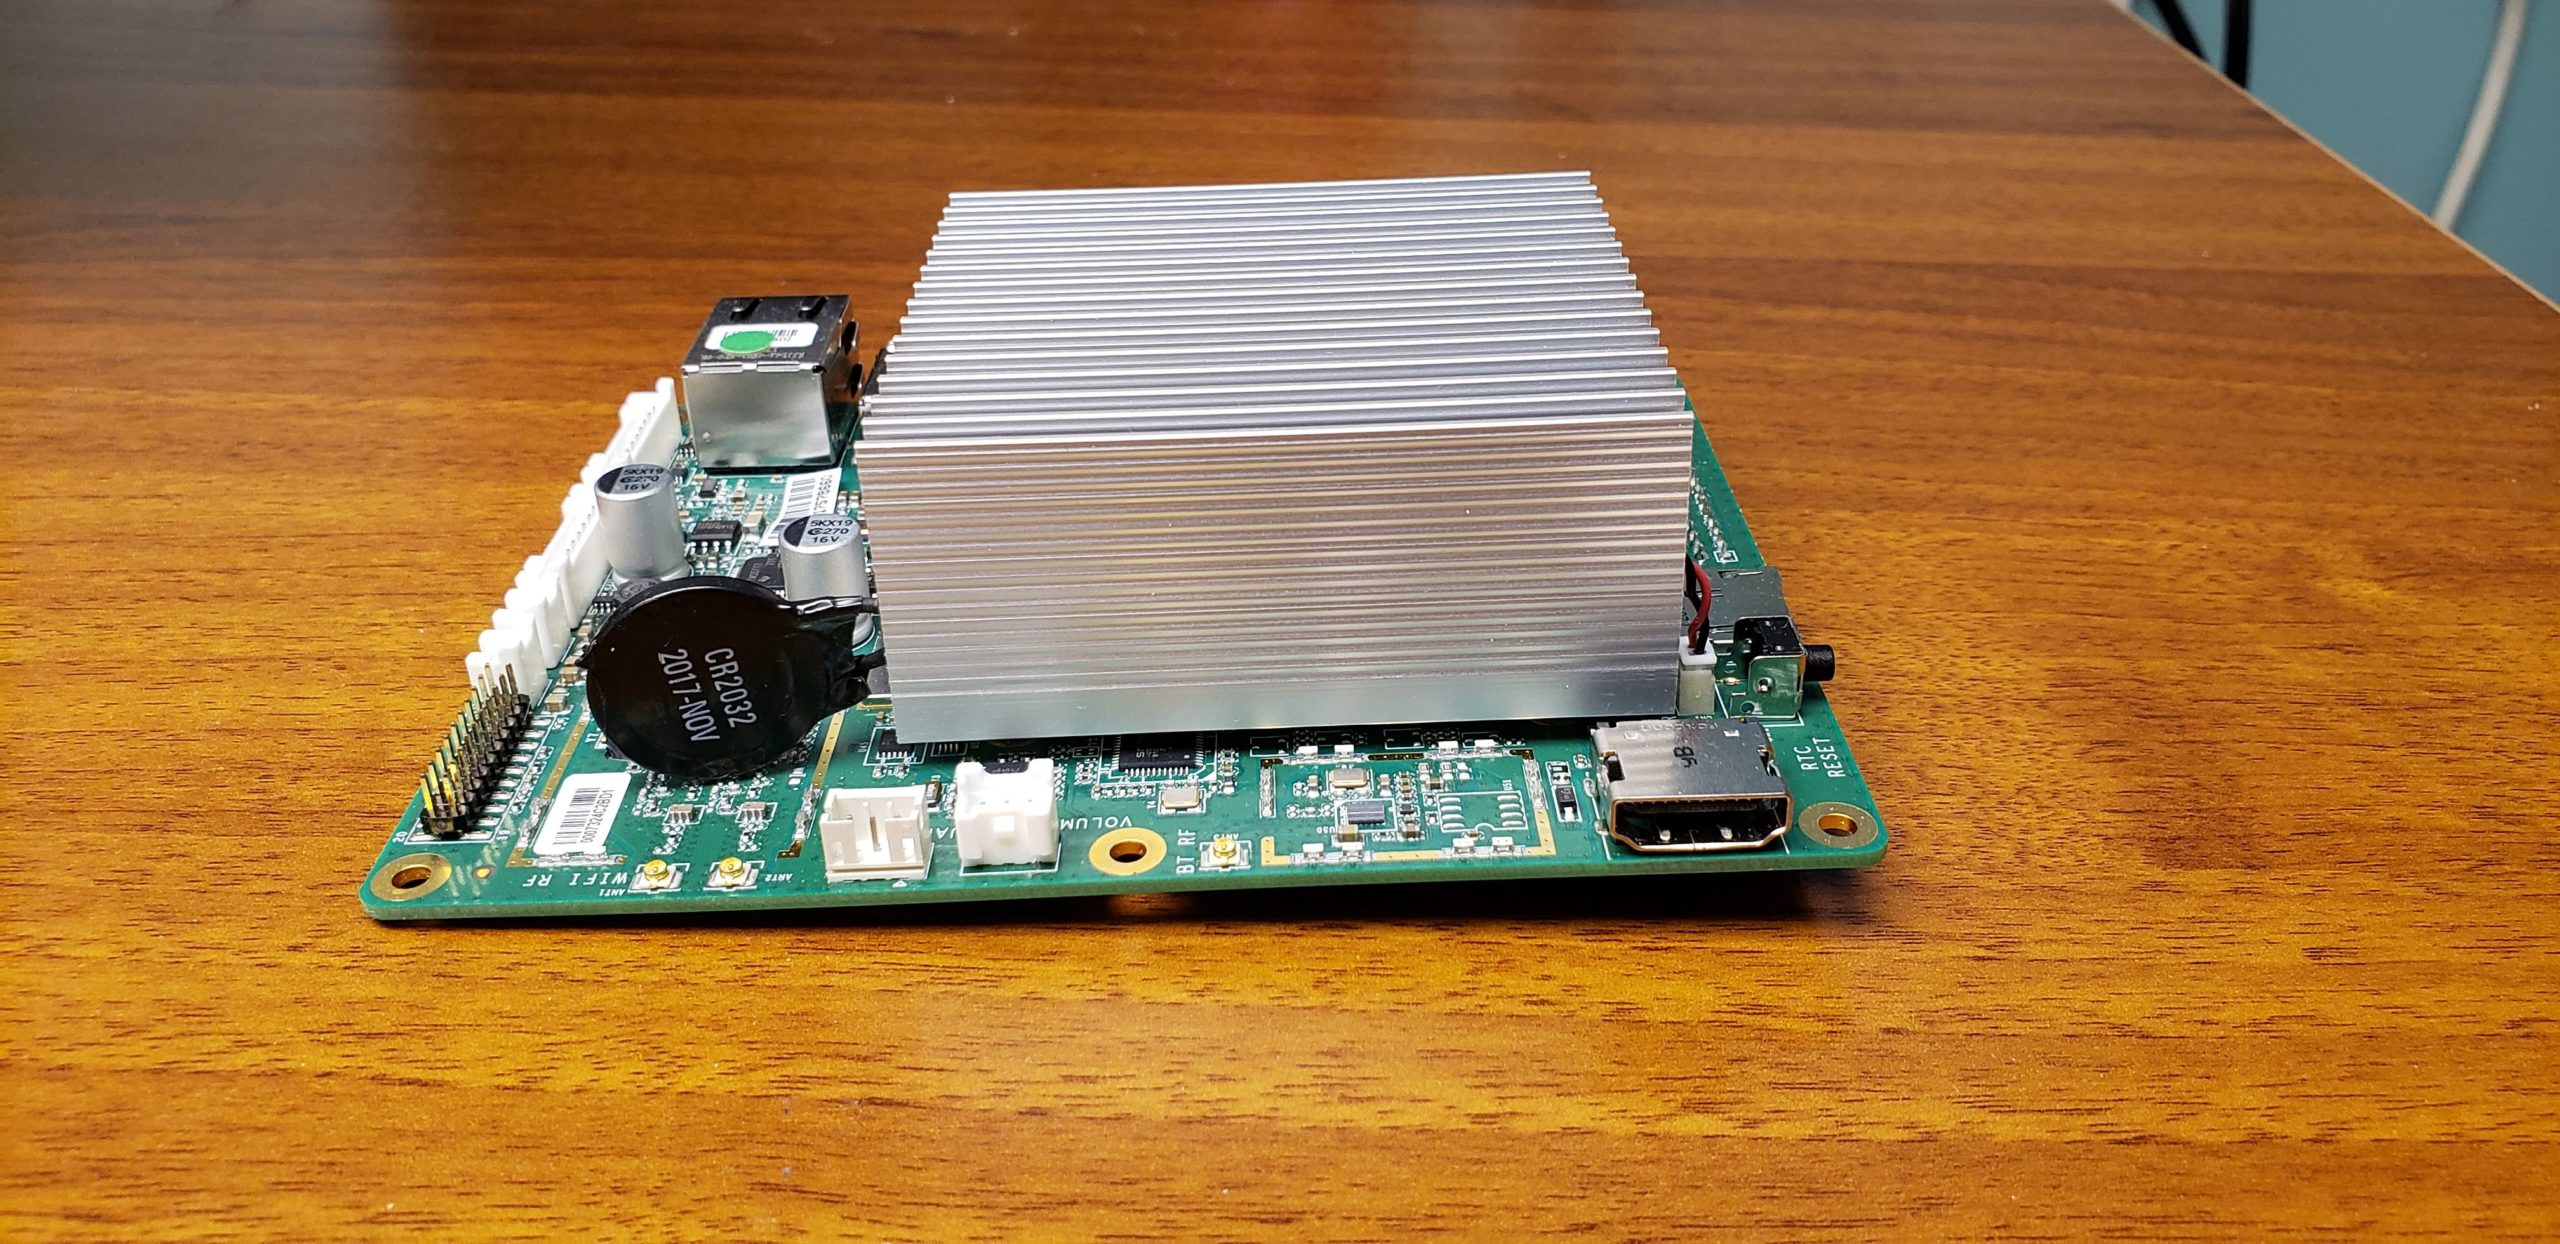
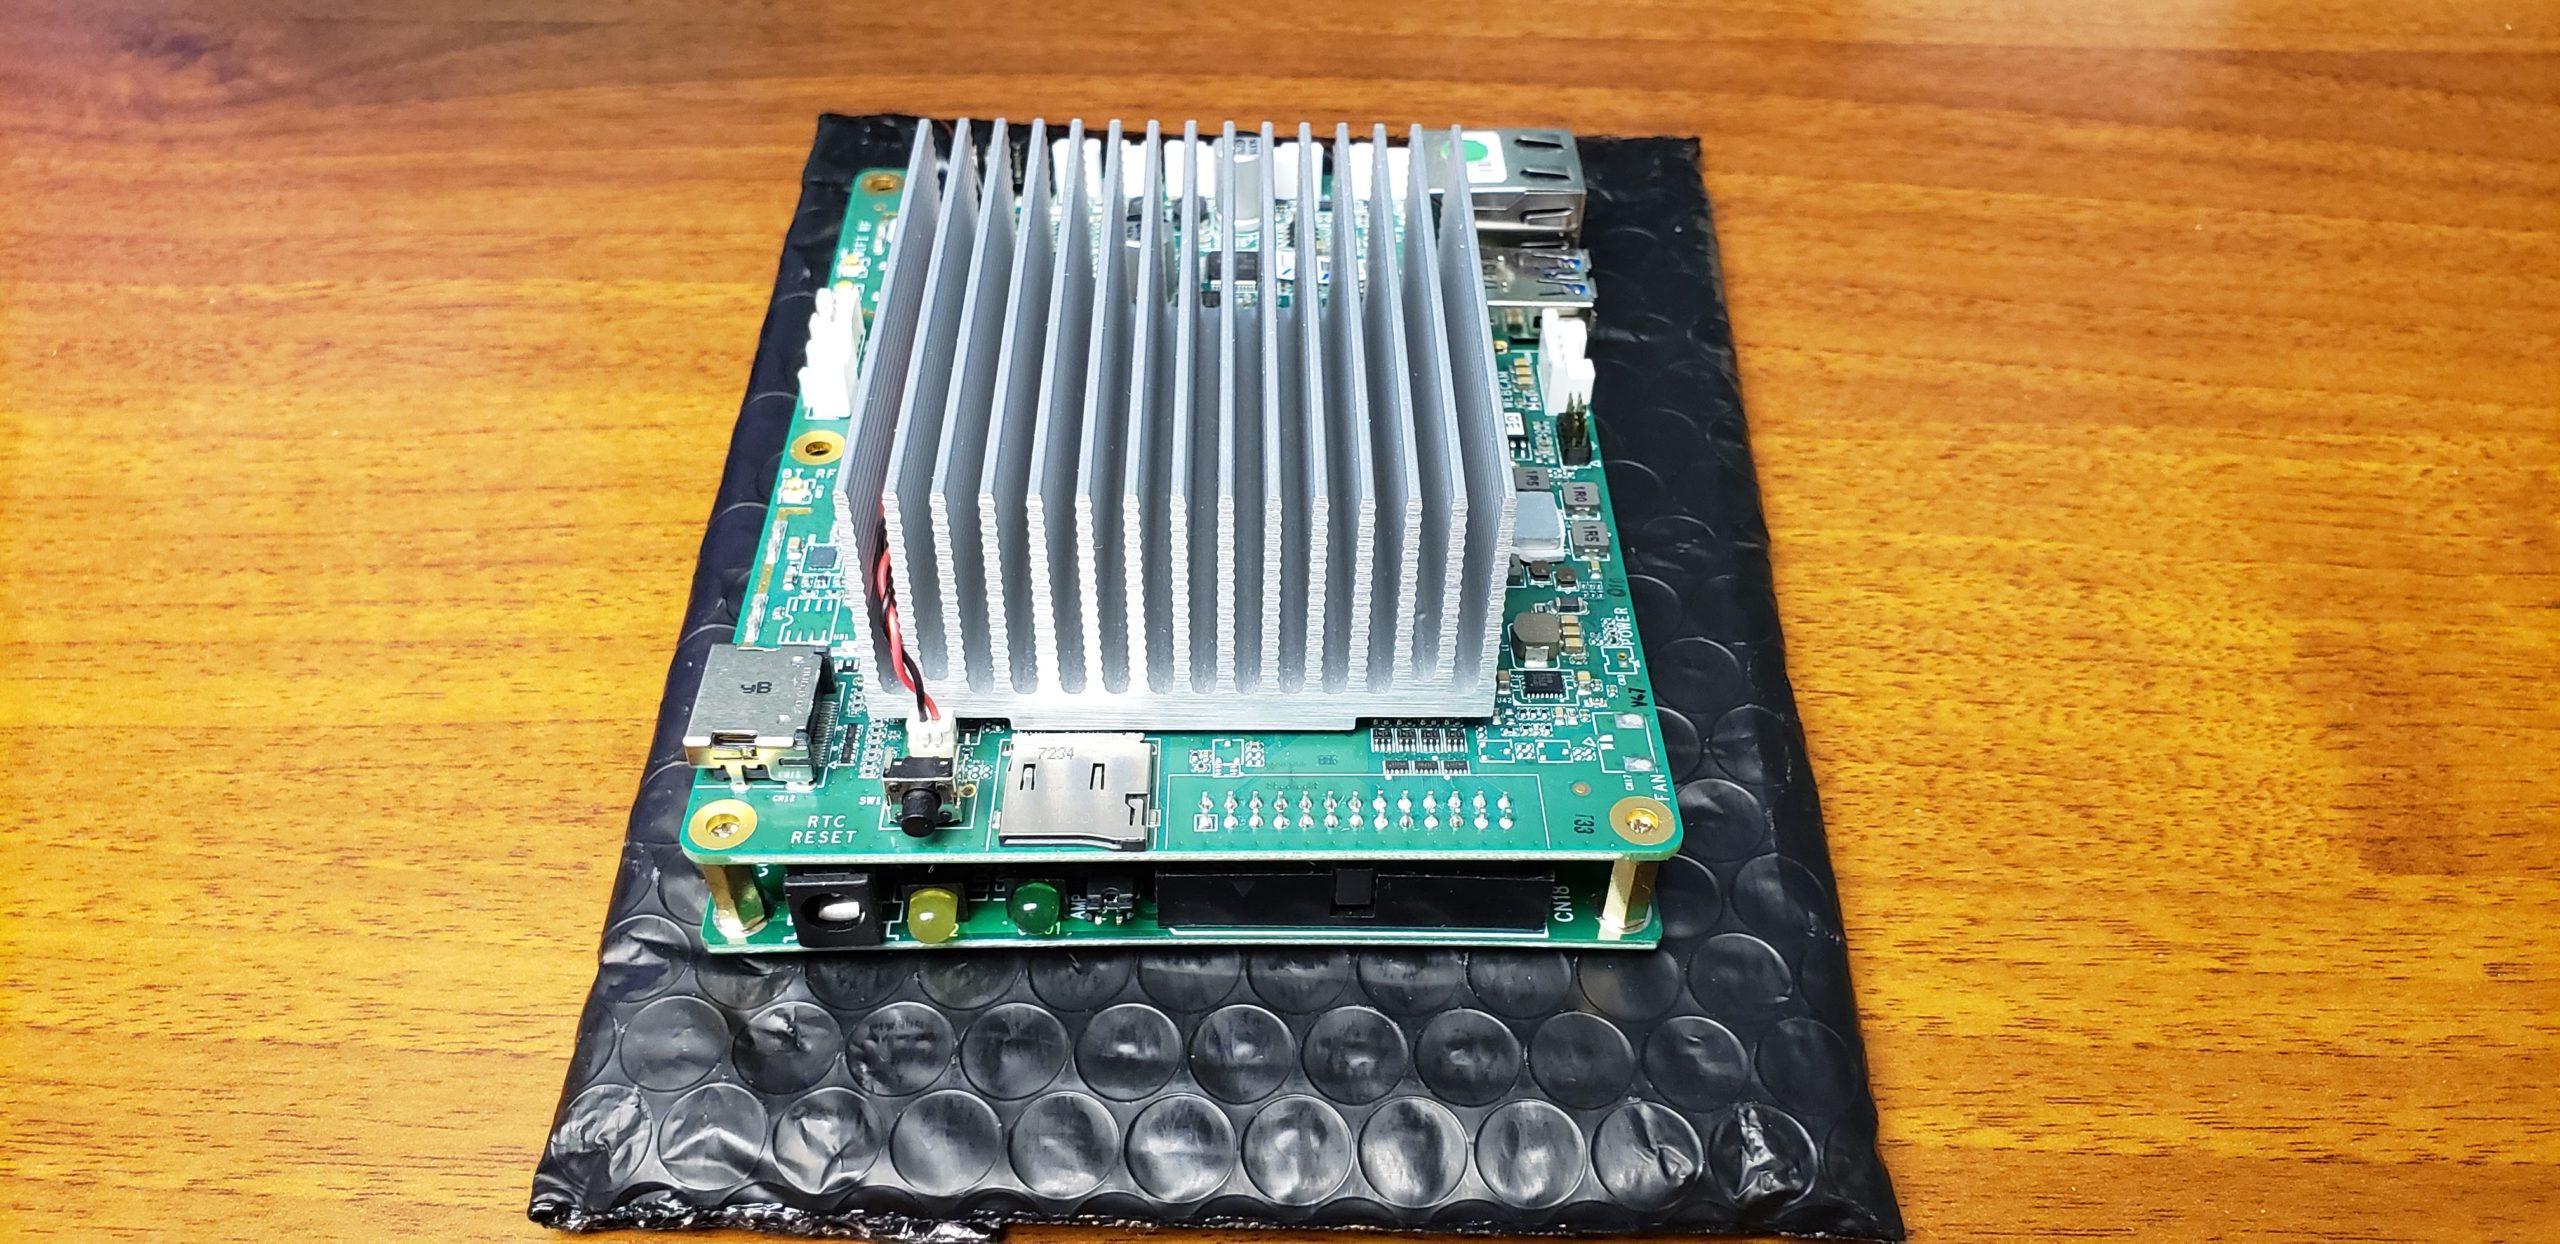
This is an Atomic Pi Its a single board computer similar to a raspberry pi that could be found for under $35.00. And to be honest it’s pretty terrible.
What’s bad about this board? The board doesn’t sit level on a surface because it has the gpio on the bottom. It has a buggy bios and can be difficult to set up initially. It is pretty limited by 2gb of ram. Unless you buy another board to power it, you have to wire power through the gpio pins.
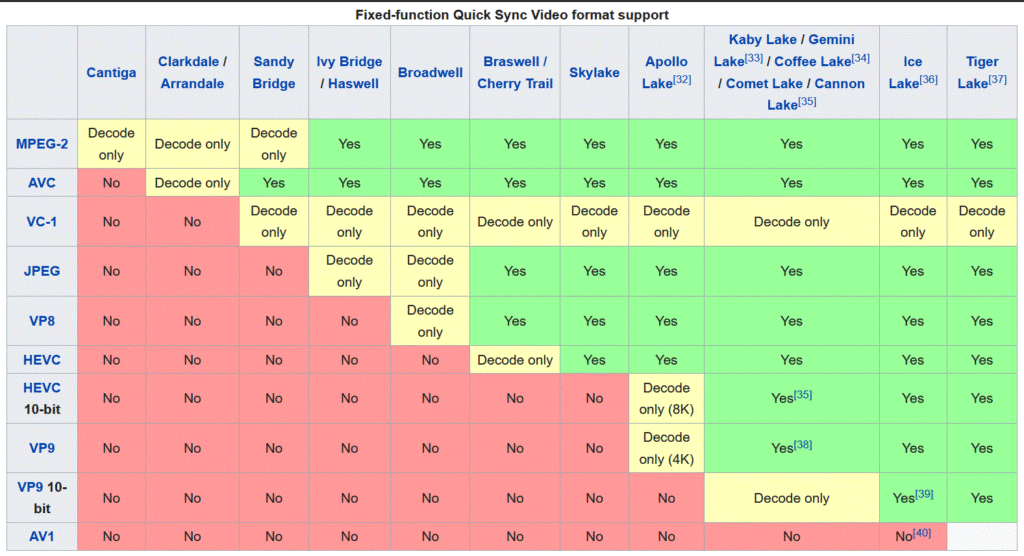
So why am I talking about it? Well what distinguishes this board is it can do hardware video encoding and decoding via Intel’s quick sync feature. This chart shows what formats the chip can do in hardware (the column labeled Cherry Tail).
This allows the board to punch way above its price point. Personally I’ve been running a plex server on this board since February 2020. I have not found its limit in a practical test. I have 3 TVs in the house with Rokus attached to them, and some people in my family who will stream content remotely. Generally I’ll peak at 3 or 4 simultaneous streams at the same time, and this board handles it with no issues. I’ve even pushed it to 7 streams with no noticeable issues. i honestly think my internet connection (currently 20 megabit upload) is the bottleneck I’ll hit first.
Storage Personally I have a raspberry pi running Open Media Vault with a 6TB Western Digital hard drive attached. All my media is on that server and I only have a small thumb drive attached to the plex server to hold configuration files. If you want to go that route, I plan to write an article on my NAS (network attached storage) in the future. If you don’t want to do this, you can attach a usb 3 hard drive directly to the atomic pi and put all your media there. I’ll go over both in future articles.
How much storage do I need? That will obviously vary person to person, but I’ll give you my rough setup. I have around 300 movies that are 1080p, and about 50 tv series and tens of thousands of songs. All that media is less than 2 terabytes. My 6tb drive will suite me for the foreseeable future. I also have plenty of hard drives in other computers where I have backups of all my media in case that drive fails (so I don’t worry about redundancy).
Plex Pass You can run a plex server without Plex Pass. But to get the most out of this little board you should use Hardware transcoding (what that chart above refers to) which is a feature only available with the paid plan. At $5 / month I think it’s worth it.
Powering the Atomic Pi The easiest way to power the Atomic pi is to buy the power supply and breakout board in the parts list above. However you can power it with any 5volt 3 amp source to the gpio. You’ll need to run 2 hot wires and 2 ground. Hot should go to pins 3 and 5 and ground to pins 4 and 6. One more note. That button on the board is not a power or reset switch. It’s a CMOS reset switch. holding that will reset the BIOS to factory defaults, so don’t push it thinking that it will just reboot the board.
Network The atomic pi has a wireless chip on it, however since it’s going to be a server I highly suggest using wired networking. If you still want or need to use wifi, here’s a spec sheet on it.
First Boot You’ll need a HDMI cable, monitor and a keyboard connected for your first boot. plug those things in first then plug the power into the board. When you see the following screen press the delete key a few times so that it will go into the bios.
When you’re in the bios you can play around with plenty of settings, but I had to set the following to get it to boot. Go to the Boot menu and change the OS Image Id to Android and change the Boot Options #1 to Android-IA then save changes and reboot. It should bring up a GUI with a login screen. On that login screen it will show the default password on that screen. Write down that password and shut down the machine.
Second Boot For your second boot you will only need the network cable plugged in, the power supply and the usb storage device (flash drive or hdd). This is when you can put the board in its case if you got one, and put it where it will live long term. After it is plugged in give it time to boot and then you can ssh in to it from another machine. The login is atomicpi and the password is what was displayed on the login screen.
Mount the usb drive 1. You’ll need to create a folder as a mount point traditionally it’s in a mnt folder sudo mkdir /mnt/usbdrive 2. get the partition name of the usb drive sudo lsblk -o NAME,FSTYPE,SIZE,MOUNTPOINT,LABEL 3. mount the usb drive to the mnt folder sudo mount /dev/sda1 /mnt/usbdrive 4. then you can navigate to the drive with cd /mnt/usbdrive
Mount a network drive 1. You need to install cifs-utils sudo apt-get install cifs-utils 2. Create a mount point mkdir /mnt/networkdrive 3. Create a user on the target machine 4. Mount the network drive sudo mount -t cifs -o username=[networkUser] //10.0.1.5/files/ /mnt/networkdrive/ This would mount a drive on the host machine 10.0.1.5 to /mnt/networkdrive. After running this command it will ask you for the [networkUser] password.
You can set the system up so that it auto mounts these drives on boot, but since I’ve only rebooted the machine once or twice in months I haven’t bothered yet.
Other Configurations Install Nano (a text editor) sudo apt install nano Change Hostname sudo nano /etc/hostname I called my plex server AtomicPlex sudo nano /etc/hosts Make sure Docker is installed docker -v
Create a Plex container Personally I use docker-compose to manage all my containers. Here’s an example of my docker-compose.yml file.
This creates a docker container that connects to a network drive for its media, and connects to a flash drive for its configuration. (plex does not support configuration being stored on a network drive).
Running the Container In order to run the above container navigate to the directory with docker-compose.yml file. Then run the following command sudo docker-compose up -d plex
Finally You can navigate to http://atomicplex:32400 Where [atomicplex] is the hostname or ip address of your atomic pi server.
Security is something nearly every app has to worry about in some form. There are a ton of incorrect or incomplete implementations around the internet. Unfortunately “good enough” isn’t good enough with this stuff. If it’s done wrong you are probably better off not doing it. I did a ton of reading to find the correct implementation, and I’d like to share it here. All examples are going to be in c# and are comparable with .Net Core. This will probably turn into a series depending on the feedback I get.
First in the series is AES (Advanced Encryption Standard). It is a synchronous encryption cypher, meaning you use the same key to encrypt and decrypt. AES has a few settings that you should know about (and get right)
Aes.Mode = CipherMode.CBC;
You have a few modes to choose from but CBC (Cipher Block Chain) is the one that you should go with. AES carves data up into blocks (128 bits) and encrypts each block at a time. This can be problematic because if you have the same data and the same encryption key then your encrypted data would look the same. This could leak information that commonly repeats. But in CBC mode the cipher adds some data from the previous block and then encrypts it. This helps change the encrypted version even if the underlying text is similar.
Aes.Padding = PaddingMode.PKCS7;
The next setting to talk about is padding. As I said above AES encrypts data in 128 bit blocks. if the last block isn’t 128 bits then what do we pad that block with? There are a few options, like zero’s but PKCS7 pads with the number of empty blocks. For example if the last 4 bytes are padding, the last 4 bytes are populated with 04 04 04 04.
Aes.BlockSize = 128;
As I’ve mentioned already AES encrypts data in 128 bit blocks. I believe this is only editable because the underlying cypher (Rijndael) had a variable block size. Just hard code it to 128.
Aes.KeySize = 256;
The key size can be set to either 128, 192, or 256. With the power of modern devices I don’t see any reason to use anything other than 256. Just a note here 128 isn’t half as good as 256. The way bit math works 255 is half as good as 256. AES 256 has 1 x 10^77 (That’s 1 with 77 zero’s after it) possible keys. AES 128 has 3 x 10^38 possible keys. So AES256 is exponentially stronger than AES128.
Aes.GenerateIV();
The Initialization Vector (IV) is where I see the most confusion, and bad practices. As stated earlier, in CBC mode AES takes some data from the previous block and mixes it into the current block creating a chain that is more scrambled than doing each block on its own. However what do you do with the first block of data? There’s no previous block to mix with. That’s what the IV is. Its a random chunk (16 bytes) of data that is mixed with the first bock before it’s encrypted. This data doesn’t need to be secret, but it does need to be unique. Luckily the AES cipher has a GenerateIV() function built in. however you’ll need that exact same IV in order to properly decrypt. This is why most people just hard code the IV with the same 16 bytes for everything they encrypt/decrypt. That works fine (though is less secure) as long as you aren’t sending the encrypted data to someone else. So what you should do is use the GenerateIV() function, and then append the generated IV to the beginning of the encrypted text. That way when you (or anyone else) are ready to decrypt you have it in the file. I’ll post my full AES implementation at the end of the article and you can see an example.
So all of the above settings are default in AesManaged. I detail them here because you may see implementations of AES in applications you work on. If they are not these settings you should ask why they are different. If there isn’t a good reason for it, you should argue for fixing it.
AES.Key = (encryptionKey);
This is the key you are encrypting with. It has to be a byte[] that is the same length as the KeySize above (again I suggest 256bits). It should be a randomized string of bits, or a hashed password. This key is what you need to keep secret. The encrypted data can be public, the settings used to encrypt can be public, the Initialization Vector can be public, but the Key HAS to be private.
That’s it for settings. The steps to encrypt aren’t too difficult. you set up 2 memory streams. One for input (the data) and one for output (the encrypted data). In between you set up a CryptoStream using the AES object you created.
Here’s a link to a demo implementation (on github) AesSimple